If you would like to offer any of my tutorials to your groups or classes, please contact me first. Please list the name of your group or class, and your website if you have one. Thanks so much!
If you like my Paint Shop Pro tutorials, be sure to take a peek at my new tutorials at Debbie T Designs. Learn how to build your own web site with free tutorials for xhtml and css!
THANKS TO LADY BICHON FOR HER PSP "MISTAKE".
IT GAVE ME THE INSPIRATION FOR THIS TUTORIAL.
1. Open the Animation Shop Program. Open a favorite .psp image you have created. Make sure the image has just one layer, and has no transparent edges showing.
Tip:** If your image has more than one layer, open it in PSP, merge visible layers, and then copy and paste as new image in Animation Shop. Then close the image in PSP, without saving.
2. Click on Effects >Insert Image Transition. Scroll down the Effects drop-down menu, click Page Turn. In the "Start With" area, click animation frame, and your image should be in the preview pane. In "End With" area, click Canvas Color -- the background should be transparent.
Define Transition:
TRANSITION LENGTH: 1.9 secs
FRAMES PER SECOND: 5 fps.
Click OK
You should now have an animation image with a total of 10 frames. Keep all the frames selected. If you happen to "unselect" the frames, just click on EDIT>SELECT ALL to select all the frames.
3. Click Edit>Copy
4. Open PSP - Click Edit>Paste as New Image. You now will have an image with 10 layers, starting with Layer 10 up to Layer 19.
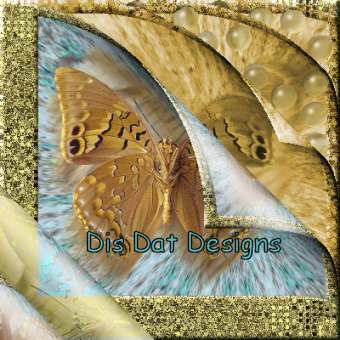
5. In the Layer Palette, hide Layer #'s 19, 16, 15 or experiment with the layers to find your perfect image. On layers 17, 13, 12, 11 I colorized to a golden hue (30 hue & 124 Saturation) Pick a color that offsets your image.
6. On Layer 17, I changed the Layer Blend Mode to Luminance.
7. On Layers 11, 12, 13 - I used the Salt & Pepper Noise Effect.
8. On Layers 11, 12 - I added some Water Drops with Eye Candy 4000 --- or you can use your own effects. Try a Texture Effect or add some bubble tubes to new layers in between the layers- or maybe some hearts, butterflies or flowers.
Use your imagination ~ these are just suggested effects that I used. You can try something different. Try to hide different layers if you want, or make more frames by adjusting the settings for the animation Image Transition (Step 2).
Thanks to everyone for the support!!!
~debbieT~
Learn (x)HTML & CSS ~ Paint Shop Pro Tutorials ~ Contact debbieT ~ Beginners ~ Free Backgrounds ~ Home