If you would like to offer any of my tutorials to your groups or classes, please contact me first. Please list the name of your group or class, and your website if you have one. Thanks so much!
If you like my Paint Shop Pro tutorials, be sure to take a peek at my new tutorials at Debbie T Designs. Learn how to build your own web site with free tutorials for xhtml and css!
|
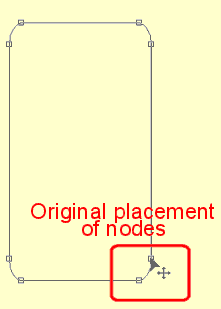
Images have been cropped for faster downloading. 1. Create a new image 400 x 500 ~ choose FOREGROUND color: Null, BACKGROUND color: Red Click on Preset Shapes tool: ROUND RECTANGLE, VECTOR, ANTI-ALIAS, Line info n/a. | |
|
Create a Round Rectangle for your stocking shape. Click the Vector OBJECT
SELECT tool |
|
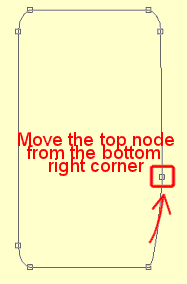
2. Move/Drag the top node in the bottom right corner up a few inches, making this the start of the toe area of the stocking. |
|
|
|
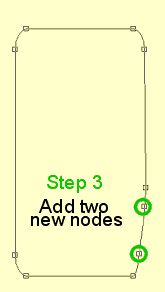
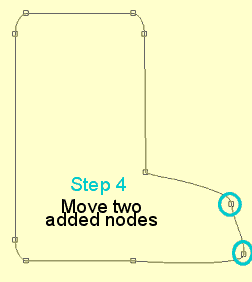
3. While still in NODE EDIT, hold down the CTRL key and hover your mouse over the area where you moved the first node. Wait for the "+ add" to appear and add two new nodes to the shape ~ see my example image for step 3. 4. Move the nodes just added, over to the right. This should start to form the toe area shape. See my example image for step 4. | |
|
|
|
|
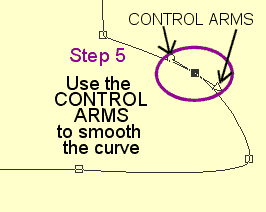
5. We need to edit the lines of our shape to make it appear smoother and less
rigid. Click on the first node added, and locate the "Control Arms"
6. Click on the original node that was moved previously in step 2 -- RIGHT-CLICK on the node, and choose NODE TYPE> ASYMMETRICAL - this adds both control arms to the node. Lengthen and Move the node where needed. See my example image for step 6. |
|
|
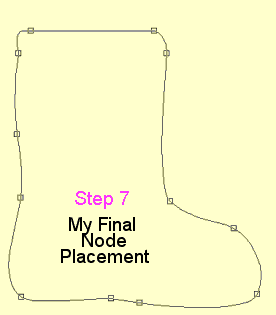
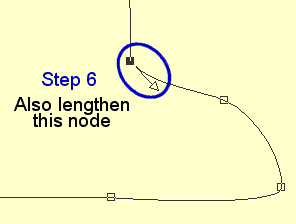
7. Keep working with each node -- change each node type to ASYMMETRICAL if needed and move and lengthen each one to make a more realistic stocking shape. I also added two more ASYMMETRICAL nodes on the left side of the shape to curve that side a little more. See my example image for step 7. |
Learn (x)HTML & CSS ~ Paint Shop Pro Tutorials ~ Contact debbieT ~ Beginners ~ Free Backgrounds ~ Home
 rotate and lengthen the arm so the line becomes smoother. If
needed, you can move the node to position it better. See my example
image for
rotate and lengthen the arm so the line becomes smoother. If
needed, you can move the node to position it better. See my example
image for