10. Now we will create the images that will make up the frames of our animation.
Click Window >Duplicate. Activate the New Image. Save as Umbrella2.psp
- Click on the Umbrella layer (which will probably be layer 3) Click the
DEFORMATION tool. ![]() This will add an editable box around the umbrella.
This will add an editable box around the umbrella.
Holding down the CTRL key, and holding down on the bottom right corner, pull DOWN and IN with your mouse; both sides should be editing together. Then hold on to the middle bottom edit node, and LENGTHEN the umbrella. Now, hold the CTRL key and the top right corner, and pull in just a bit. You want the umbrella to look like it is starting to close. If it doesn't look right, undo and try again. It just takes some practice and experimentation. Save again.
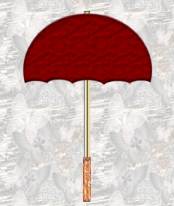
Your image should look similar to this. We will have a total of 4 frames for our animation.
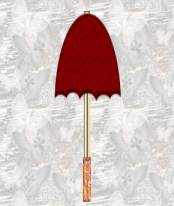
11. Now click on Window >Duplicate (the duplicate is of the second image - Umbrella2.psp) Save as Umbrella3.psp - click on the umbrella layer. Use the DEFORMATION tool as in Step 10. Pull DOWN and IN on both the TOP and BOTTOM corners to shape the umbrella. And LENGTHEN it more. Save again. This is our 3rd Frame.
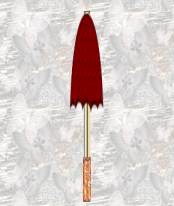
12. Duplicate the image #3. Save this new image as Umbrella4.psp -- click on the umbrella layer. Use the same steps to deform our umbrella. It should look closed at this point. If the umbrella shifts out of place, use the MOVER tool to re-position it. If this image looks just how you want it, Layers >Merge Visible and Save!
13. Activate each of the other 3 images, and if they look right, click Layers >Merge Visible and SAVE each one. If you are not confident in how your deformations turned out, and think you might want to make changes to them, then save them all as new .psp file names, like 2umbrella1.psp - Then you will still have the images with unmerged layers to go back and edit later.
14. Run Animation Shop. Click on the Animation Wizard.
- 1st box: Click same size as the 1st image.
- 2nd box: Transparent
- 3rd box: Centered in frame with canvas color / With canvas color.
- 4th box: Yes, repeat the animation indefinitely / 20th second.
- 5th box: Click Add image and select all 4 images
make sure the images are arranged in the correct order.
Before you save your animation, it is a good idea to run the File >Optimization Wizard:
- 1st box: Animated GIF file / Create a new animation.
- 2nd box: Click the Customize button > 255 colors / Optimized Median Cut / Nearest color.
- Click through the rest of the boxes and finish.
Because you can create a new animation with the optimization wizard, you can experiment with decreasing the # of colors to get the best result. If your file size is too large, you can resize by clicking on Animation >Resize Animation. When you are satisfied, save the animation.