1. Open New Image 500 x 500 (or larger if you prefer) transparent background. Click on the SELECTION tool. Ellipse, Feather 0, Antialias UNchecked. Draw the bear's head.
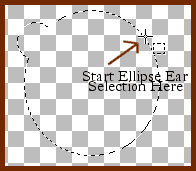
2. Now we will add the ears. Holding down the SHIFT key, start the cursor at the edge of the head selection, and drag out the ear shape. Hold the SHIFT key and draw the other ear. **Note: holding the Shift key adds to a selection. Holding the Ctrl key deducts from the selection.
Save our image -- "TeddyTemplate.psp"
3. Click on the foreground color button and choose a brown color. Click FLOOD FILL tool, and fill with brown. Selections> SELECT NONE.
4. Creating the Bear's Body: Click on PRESET SHAPES tool. Ellipse, Filled, Line Width 1, Antialias UNchecked, Vector CHECKED. Place your cursor an inch or so under the bear's head. Now create the shape of his body. The top of the body ellipse shape will be touching the bottom of the head/chin area. You will notice that there is a "Vector" box around the body shape. By moving your cursor over areas of the box you will find editing handles to "Rotate", "Move", and "Resize" the Vector Shape.
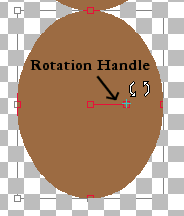
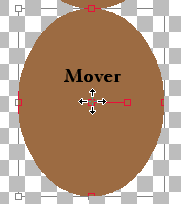
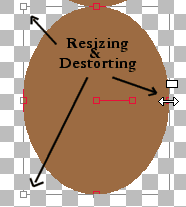
Use these editing handles to reshape his body. Hold down the Shift or Ctrl
keys with the resizing handles to change perspective or skew the shape. Once
you are happy with his shape, RIGHT-CLICK the vector layer in the LAYER PALETTE,
and "convert to raster". If your vector box becomes unselected
somehow, click on the Vector Selection tool icon ![]() .
.
5. Creating Bear's Arms: We are going to make another Vector PRESET SHAPE. Place cursor in an area at one side of our bear's body. Draw a vertical ellipse for his arm. Now, use the Rotation Handle and Mover Handle to place the arm in the correct angle & position.
Also, use the Shift and/or Ctrl keys with the Resizing handles to shape and bend the arm. Use EDIT> UNDO if you make an error. When you are satisfied with your arm, RIGHT-CLICK on the vector layer, and "convert to raster".
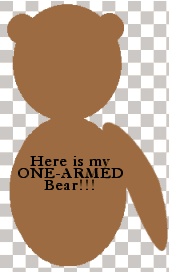
Here is my Bear's Shape so far. Remember to keep SAVING your image.
6. Now create the other arm using the same process as in Step 5. Make sure to "convert to raster" when the shape is just right. *If you do not want to make a different Vector shape for the second arm, try LAYER > DUPLICATE and then IMAGE > MIRROR and move your arm into place on the other side of his body.
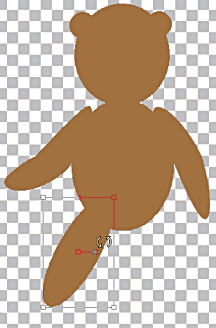
7. Creating Legs: Click PRESET SHAPES. Ellipse, Filled, Line Width 1, Antialias UNchecked, Vector CHECKED. Place the cursor in an area to the side of his body. Draw a vertical ellipse for his leg. Use the same Editing Handles to ROTATE, MOVE and SHAPE the leg. When done, RIGHT-CLICK on the vector layer, and "convert to raster".
8. RIGHT-CLICK on the leg's layer and click DUPLICATE. A copy of the leg is
created on a new layer. Click IMAGE > MIRROR, and then click the MOVER
Tool to put in place. If it looks like it is at a funny angle, click on the
DEFORMATION tool ![]() and Rotate or Deform the leg. You can also make a totally different leg by
creating a new Vector Preset Shape.
and Rotate or Deform the leg. You can also make a totally different leg by
creating a new Vector Preset Shape.
9. Adding Paws to Legs: Using the same VECTOR PRESET SHAPES tool as in previous steps, draw a small ellipse shape for the first paw. Then ROTATE, MOVE, and SHAPE the paw. RIGHT-CLICK on the vector layer, and "convert to raster". Click LAYERS > DUPLICATE to create the second paw for the other leg.
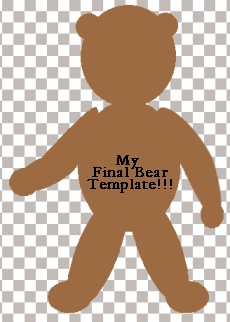
10. Now add paws to the arms. You can duplicate the first leg paw, or make new VECTOR PRESET SHAPES.
Look over your bear shape. Make any edits to the different bear shape layers. Remember to SAVE!
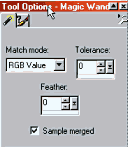
11. Click the Selection MAGIC WAND tool. Match Mode RGB Value, Tolerance 0, Feather 0, Sample Merged CHECKED. Now click anywhere in the transparent area. Click SELECTIONS > INVERT. Because "Sample Merged" was checked, all the layers come together for the selection. The whole bear should be selected.
12. Now, click SELECTIONS > SAVE TO DISK. Navigate to the folder you want to save the teddy selection in. And that is it! Keep the layers in the "TeddyTemplate.psp" UNMERGED so you can make adjustments to it at a later time.