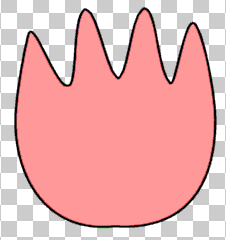
This is my tulip so far. I moved the two nodes on the left and right to make the tulip a bit wider, & I moved the control arms on the the bottom middle node a bit to flatten out the bottom.
Now we can finally get started on the stem! With the Vector Object Select tool, click on the tulip top shape, and move it towards the top of the canvas to make more room for the stem and leaves.
10. Keep your FOREGROUND color BLACK, and change the BACKGROUND color to GREEN.
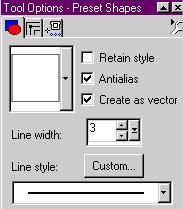
Click on the PRESET SHAPES tool ![]() In the Tool Options box: RECTANGLE, Line Width (3), STRAIGHT Line
Style, ANTIALIAS, VECTOR are checked.
In the Tool Options box: RECTANGLE, Line Width (3), STRAIGHT Line
Style, ANTIALIAS, VECTOR are checked.
Draw a thin rectangle shape on your canvas.
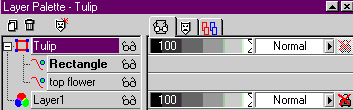
11. Looking at your Layer Palette, there is a new Sub-Layer called RECTANGLE. Double-click this layer, and rename to STEM in the Properties Dialog Box. Click OK.
In the Layer Palette, use your mouse to "click and drag"
the STEM layer so it is moved under TOP FLOWER. Now the flower is on top
of the stem, so it looks more natural. If needed, use the Vector Object
Selection tool ![]() to move the stem to the best position.
to move the stem to the best position.
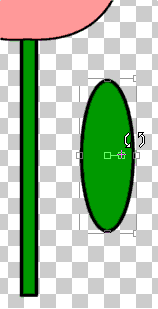
12. Now for the leaves. Use the PRESET SHAPES again to make two long and thin oval shapes (ELLIPSE) Same Tool Option settings as in step 10.
This will also add two more Sub-Layers to the Layer Palette. Rename them LEAF ONE and LEAF TWO.
13. With the Object Selection tool, select one of the leaves. Positioning
your mouse over the middle ROTATE ![]() handle, rotate the leaf shape to the appropriate angle for your stem.
handle, rotate the leaf shape to the appropriate angle for your stem.
|
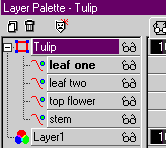
There now should be 4 Sub-Layers in our
layer palette
|
. |
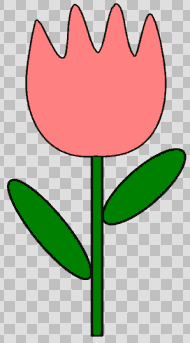
Here is what my tulip looks like now...(resized image)
Now, save save save!!
14. Next, we are going to GROUP our objects. In the Layer Palette, hold down the SHIFT key, and click each one of the Sub-Layers. This selects each Sub-Layer and also adds an Editing Box around each of the objects as you click on each sub-layer. When all four layers are selected, one editing box will be around the whole image and each of the sub-layers will be highlighted in bold text.
|
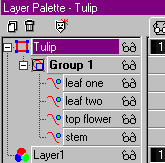
Now RIGHT-CLICK on one of the sub-layers, and click GROUP. Another layer grouping the sub-layers is added. Double-click the new layer (Group 1) and rename it TULIP. |
|
15. With the Tulip Group still selected, click FILE> EXPORT> SHAPE. If a Warning Message comes up, click OK. Then type in the name of our shape, Tulip. Click OK
Now if you click on your PRESET SHAPES tool, you will find your tulip in the list of shapes!!!
NOTE: There have been some PSP'rs that have experienced problems with "finding" the tulip shape in the pull down list after the export step...there are a couple of remedies -- and I am sure one will work for you!
*Go into Windows Explorer, and navigate to the directory where you installed PSP. Go into the cache folder: JASC/PAINTSHOP PRO/CACHE and delete the shapes.jpc file.. don't worry it will rebuild when you reopen PSP and click the shapes tool.
*In Windows Explorer, navigate to the directory/folder that PSP7 was installed in. Find the shapes folder. Create a new sub-folder in the shapes folder and move some of the shapes into the sub-folder.
If this doesn't work for you, try shutting down PSP and then opening it again, and try the FILE> EXPORT> SHAPE process over again. (Thanks to Trijn :-) and Bonesy :-) for their helpful advice!!!)